Trampoline and snow scooters: what are they and why aren’t they freestyle scooters?
21. October
Entire article
Written by Martin Nogol, Scootshop.cz · Updated on the 14th. 10. 2026
⚡ In short: the order is the same for all systems. Loosen the clamp → tighten the compression bolt → straighten the handlebars → tighten the clamp bolts in a cross pattern → test.
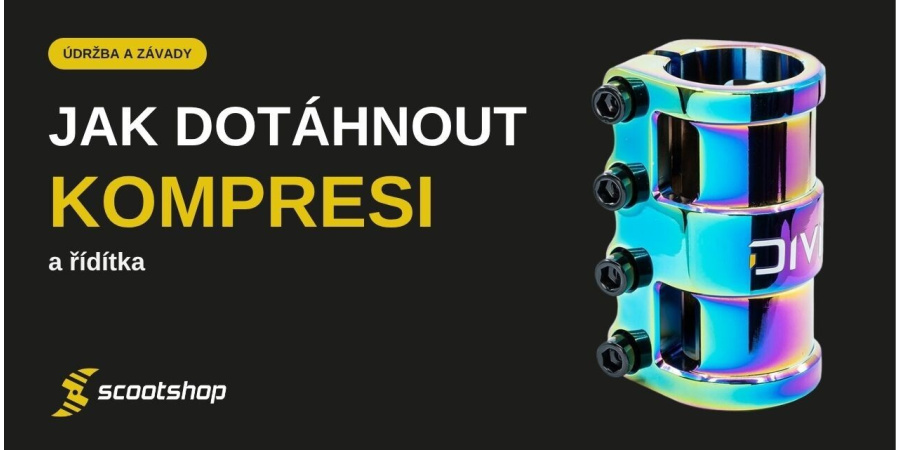
The only difference is where the compression bolt is located: with HIC and IHC, it is beneath the cap at the top of the handlebars; with SCS, it is inside the large clamp (with the historic ICS system on older scooters, it is underneath the fork).
Tighten the compression to the sweet spot: no play, the handlebars turn smoothly, nothing overtightened.Tool: hex key, most commonly 6 mm (varies by manufacturer). It will take 5 minutes.
⚙️ Compression → sleeve
Always. You’ll never be able to fully tighten the headset the other way around.
🎯 Sweet spot
No play, smooth rotation. Not „to the point of bloodshed.”
✖️ Across
Loosen the clamp bolts gradually, tightening four of them in the order 1, 3, 2, 4.
🧰 Allen key
Most commonly 6 mm; varies by manufacturer. A high-quality one, not the one from the package.
🔊 Drop test
Always at the end. Is it knocking? Back to step 1.
Compression pulls the fork, headset (the bearings in the deck’s head tube, in which the fork rotates), and handlebars together so that there is no play in the bearings. The clamp then secures the handlebars to the fork. That is why the order matters: first, compression takes up the slack, then the sleeve locks the position. If you tighten the clamp first, you lock the handlebars and fork in a position with play, and the compression bolt can no longer adjust it.
Sweet spot is the amount of compression at which:
Tighten in quarter-turn increments, testing both after each adjustment. Once the will is gone, stop. Tightening it “as hard as you can” won’t help: the headset bearings bind and get damaged, the handlebars turn stiffly, and in extreme cases you can strip the threads in the fork. The correct force is firm hand-tightening with a standard Allen key, without extending the lever.
The type of compression is determined by the fork. You can identify it most quickly by the socket and the location of the screw.
| ⚙️ System | 🔩 Where the compression bolt is | 🧰 Tools | 👀 What to watch out for |
| IHC most common on complete scooters | Under the top cap at the top of the handlebars. It screws into the thread in the fork steerer tube. | Hex key, most commonly 6 mm (varies by manufacturer). | Handlebars with a 28 mm inner diameter and a slot only. The IHC compression ring must fit in the upper bearing; otherwise, the play will not disappear. |
| HIC | Under the top cap in the handlebars, just like IHC. There is also a HIC shim on the fork steerer. | Allen key, most commonly 6 mm. | The shim must be fully fitted onto the fork, and the clamp must cover the slot. It can’t be finished without a shim. |
| SCS | Inside the large clamp with 4 bolts; the top cap with a bolt sits inside the clamp, not in the handlebars. | Allen key, most commonly 6 mm. | Handlebars without a notch (with a notch only with a bar adapter). The collar must extend above the fork; otherwise, a spacer under the headset will help. |
| ICS historical, only older scooters | Underneath the fork, between the arms by the front wheel. It leads up to the handlebars. | Allen key plus a 13 mm wrench for the front wheel axle. | The front wheel must be lowered to tighten it. It is no longer used today. |
If you’re not sure which one you have, you can find an overview of all systems with pictures in the guide Compression Systems Explained.
ICS is no longer used today; you’ll only find it on old scooters. The procedure is the same; the only difference is that the compression bolt is underneath the fork: loosen the clamp, remove the front wheel (13 mm wrench), tighten the bolt underneath until it reaches the sweet spot, align the handlebars with the fork arms, tighten the clamp bolts in a crisscross pattern, and reinstall the wheel.
💡 What it looks like in real life
We show the complete assembly and tightening of the set, including the compression fitting and sleeve, in the video. It's useful when you're not sure where things are.
A complete step-by-step inspection of your new scooter can be found in the article How to Assemble a New Freestyle Scooter and What to Check Before Your First Ride.
If you've gone through the procedure twice and the play still doesn't go away, or the compression keeps loosening itself after every ride, the problem is usually not you, but the parts:
If none of these apply, or if the scooter is knocking somewhere else (wheels, brake), the troubleshooting guide in the article Scooter rattles, knocks, or has loose handlebars can help. Compression parts, shims, and adapters are in the compression and shims category, standard clamps are in the clamps category, and SCS clamps are in the SCS category.
Find the sweet spot: the handlebars have no play when rocked back and forth, while still turning smoothly. Tighten in quarter-turn increments, testing after each turn. No “going all out.”
The sleeve was most likely tightened before compression. Loosen the clamp, retighten the compression fitting, and only then tighten the clamp in a cross pattern. If that doesn’t help, the shim or IHC ring is missing, or the thread is stripped.
Hex key, most commonly 6 mm; the size varies by manufacturer. A quality Allen key, not the soft one from the package; a rounded Allen key will strip the screw head.
No. Just loosen the clamp and remove the cap at the top of the handlebars; the compression bolt is underneath. The handlebars are removed only when replacing or cleaning the headset.
On a new scooter, after each of the first few rides, the parts settle in. Then all you need to do is perform a drop test before riding and tighten it if any play is detected. Go through everything once at the beginning of the season.
First, check that the clamp is tightened in a cross pattern and that no shim is missing. If the bolt keeps loosening, a drop of thread locker on the compression bolt can help—not on the clamp bolts. If that doesn’t help either, the thread is stripped.
Bring your scooter to our store in Pardubice and we’ll tighten it up and show you how; we also service scooters purchased elsewhere. You can find parts in the freestyle scooter parts category, and more guides in the Guides section.