Trampoline and snow scooters: what are they and why aren’t they freestyle scooters?
21. October
Entire article

Written by Martin Nogol, Scootshop.cz · Updated on the 14th. 10. 2026
⚡ In short: a new scooter isn’t ready to ride straight out of the box. Assembly and inspection take 10–15 minutes.
The order is always the same: tighten the compression fitting first, then the sleeve. Tighten the clamp bolts gradually in a cross pattern. Once tightened, neither the handlebars nor the wheels should have any play, but do not overtighten anything.
Before your first ride, perform a drop test: lift the scooter a few centimeters off the ground and let it drop.
A dull sound is fine, knocking and rattling mean something isn’t tightened. If it knocks, don't drive.⚙️ Compression → sleeve
Always in this order. The headset will never tighten all the way in reverse.
✖️ Crosswise
Tighten the clamp bolts gradually and evenly, not one all the way and then the other.
🔊 Drop test
Release from a few centimeters away. A dull sound is OK; knocking means something is loose.
🔁 After the first rides
The parts fit together. Check the clamp, compression and wheels after every ride.
🚫 Knocking? Don’t drive
The permitted scooter is deteriorating and may fail during a jump.
Did you buy a new freestyle scooter? Great. Before you take it to the skatepark or the street, you need to assemble it correctly, tighten it, and check it. The set comes partially disassembled from the factory (most often, the handlebars are separate), and the bolts are tightened for transport, not for jumping.
With a new scooter, some parts may also settle in during the first few rides. If you prepare it properly from the start and check it after the first few rides, you’ll avoid rattling, play, loose bolts, and unnecessary premature wear. If you’re assembling the scooter for a child, everything is the same; just make sure you check it after each ride.
Complete factory-built freestyle scooter. In the video, you’ll see how to unpack, assemble and tighten the scooter, and how to handle it.
Custom freestyle scooter. Custom scooters (assembled from individual parts) can have various combinations of parts, compression systems, clamps, and handlebars. Therefore, make sure to check that they are tightened properly and that the parts are compatible.
First inspect the scooter visually and by hand before you start tightening anything.
| 🔍 What to check | 🛠️ How | 💬 Why |
| Damage during shipping | Inspect the handlebars, deck, and wheels for dents, cracks at the welds, bent tubes, and chipped PU. | The damaged part should not be tightened further; it should be reported as a warranty claim. The crack by the weld opens up when jumping. |
| Wheels fitted and tightened | Try rocking the wheel from side to side; the axle should be firmly tightened with a wrench. | A loose axle is the most common cause of wheel clicking and wobbling. |
| The wheels spin freely | Spin the wheel by hand: it should rotate smoothly and quietly for several seconds. | Grinding or squeaking = a poorly seated bearing or an overtightened axle. |
| Compression fully engaged | Place the front wheel between your feet and rock the handlebars back and forth. | Play = looseness or headset (the head assembly, the bearings in which the fork rotates). |
| The handlebars rotate freely | Lift the front wheel and turn the handlebars all the way around. | It must run smoothly. A stiff headset = overtightened compression. |
| Clamp tightened | Place the front wheel between your feet and try turning the handlebars against the wheel. | If the handlebars rotate, the clamp (which holds the handlebars to the fork) is loose. |
| Handlebars aligned with the wheel | Look from above: the handlebars should be perpendicular to the wheel. | Bent handlebars are difficult to control. |
| Brake | Press and release. It must not bind, it must not be loose, and it must rest against the wheel. | A sticking brake damages the wheel; a loose one rattles and fails to brake. |
| Drop test | Lift the scooter a few cm and drop it onto its wheels. Listen. | A dull sound is fine. Knocking or rattling = something is loose. If something is knocking, don’t drive. |
The most important part of the guide. Most scooters that come in with a knocking sound just have the tightening sequence mixed up.
Why in this order? Compression removes play from the headset bearings, while the clamp secures the handlebars to the fork. If you tighten the collar first, you lock the handlebars and fork in a position with play, and the compression bolt can no longer move them. The scooter keeps rattling, no matter how much you tighten it.
How tight to fasten. Find the “sweet spot”: once tightened, there should be no play anywhere, but don’t overtighten anything. Tightening it "as much as possible" can strip the threads in the clamp, dent the handlebars at the notch, or overload the headset bearings. Tighten it firmly by hand with a standard Allen key, without extending the lever.
💡 Can't fit the handlebars?
Or are they loose on the fork?Two most common causes. Slit vs. no slit: Handlebars for HIC and IHC (and the historical ICS) have a vertical slit at the bottom so the clamp can tighten them; SCS handlebars have no slit and cannot be tightened with a regular clamp. Diameter: standard handlebars have an outer diameter of 32 mm, oversized handlebars 35 mm. If the handlebars are a few millimeters loose in the fork or clamp, the shim—a thin metal adapter that compensates for the difference—is missing (it is usually included). Details are explained in the guides Compression Systems and Handlebars.
The compression system pulls the fork, headset, and handlebars together into one rigid unit. With complete sets, you’ll encounter three systems; the fork determines the type.
| ⚙️ System | 🔧 What it looks like | ✅ Properly tightened when… |
| IHC most common on complete setups | Fork with a narrower steerer tube, standard handlebars (32 mm) with a slit, a compression bolt under the top cap at the top of the handlebars (it screws into a thread built into the fork steerer), a clamp with 2–3 bolts. | Rocking the handlebars back and forth without play, the handlebars turn smoothly, and the cap sits straight. The compression is tightened with the sleeve loosened. |
| HIC | Like IHC, but with oversized steel handlebars (35 mm) with a slit and a shim fitted onto the fork steerer tube. 35 mm clamp. | Same as IHC. Additionally, the shim sits entirely on the fork, and the clamp covers as much of the slit as possible (ideally all of it; manufacturers often make it longer to make tightening easier). |
| SCS | Large 4-bolt clamp with built-in compression: the compression bolt is inside the clamp, and the handlebars are un-slotted. The strongest and heaviest. | First, tighten the compression bolt inside the clamp until there is no play, then tighten the lower clamp bolts (which clamp the fork), install the handlebars, and tighten the upper bolts. Bars with a slit are not compatible with SCS; they can only be used with a bar adapter. |
The historic ICS (a bolt underneath the fork, tightened after removing the front wheel) is no longer used today; you’ll only find it on old scooters. All systems and handlebar compatibility are covered in the guide Compression Systems Guide, with parts available in the compression and shims category.
Wheels must rotate freely and must not have any lateral play. Try wiggling the wheel: if it moves, tighten the axle. If it rubs after tightening, the bearing is seated incorrectly or a spacer is missing between the bearings; do not tighten it any further, as this will destroy the bearing.
Brake (on complete assemblies, most commonly a flexible metal sheet “flex fender”) must not rub against the wheel when at rest, must not be loose, and must make contact with the wheel when pressed.
A rattling brake has a loose bolt; a rubbing brake is incorrectly seated or bent.The rear brake on a freestyle scooter is mainly for tricks, not for constant braking. If the rider keeps standing on it, a flat spot will wear into the wheel, causing it to bounce. Brake gently and briefly; otherwise, put your foot down. You can find replacement parts in the wheels and brakes categories.
The parts are settling in. The headset bearings will settle in, the clamp will loosen slightly, and the wheels will break in. So after each of the first few rides, check the clamp, handlebars, headset, wheels, and brake. It takes a minute; usually a drop test is enough. Later, checking once every few rides is enough.
💡 Basic maintenance in six points
1. Regularly check the bolts: the clamp, compression, wheel axles, and brake. 2. Clean with a dry cloth, not water; never use WD-40 on bearings—it is not a lubricant. 3. Check the condition of the wheels (flat spots, chipped PU) and bearings (noise, grinding). 4. Inspect the deck and handlebars around the welds and head tube for cracks, especially after a hard fall. 5. Use wax when grinding. 6. Don’t ignore noises; new knocking always has a cause. You can find the products in the maintenance category, and the bearing procedure in the How to Handle Bearings guide.
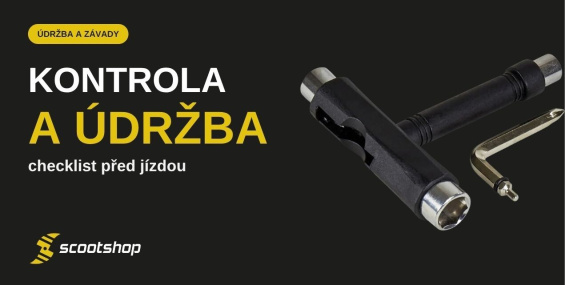
The basic tool is an Allen key, most commonly 6 mm, sometimes 5 mm (clamp, compression; the size varies by manufacturer). For the brake, occasionally a 3 or 4 mm Allen key; for the wheel axles, a 13 mm wrench. Some sets include a key in the package.
In 9 out of 10 cases, the order is: loosen the stem clamp, tighten the compression plug, align the handlebars, and only then tighten the clamp bolts in a cross pattern. If it keeps knocking, check the wheel axles and the brake screw.
The handlebars turn stiffly or catch, even when the clamp is loosened. Loosen the compression screw by a quarter turn and try again; it’s correct when the play is gone and rotation remains smooth.
No, this is normal with a new scooter: the parts settle in and the clamp loosens a little. Pull her back into the cross again. If this happens after every ride, check whether a shim is missing and whether the clamp matches the handlebar diameter.
Contact us or come to our store in Pardubice, and we’ll assemble and tighten your scooter on the spot. You can find spare parts in the freestyle scooter parts category, and more guides in the Guides section.